Mini Excavator Preventive Maintenance: Daily Walkaround & Service Intervals
A master preventive maintenance checklist for mini excavators: daily walkaround protocols, track tensioning, grease schedules, and 250/500/1000-hour fluid flushes.
A master preventive maintenance checklist for mini excavators: daily walkaround protocols, track tensioning, grease schedules, and 250/500/1000-hour fluid flushes.
The True Economics of Proactive Equipment Care
In compact earthmoving equipment, the cost difference between **proactive preventive maintenance** and **run-to-failure emergency repairs** is staggering.
Industry fleet studies demonstrate that every $1.00 invested in disciplined lubrication, filtration, and fluid analysis saves over $6.50 in catastrophic component overhauls and unplanned jobsite downtime.
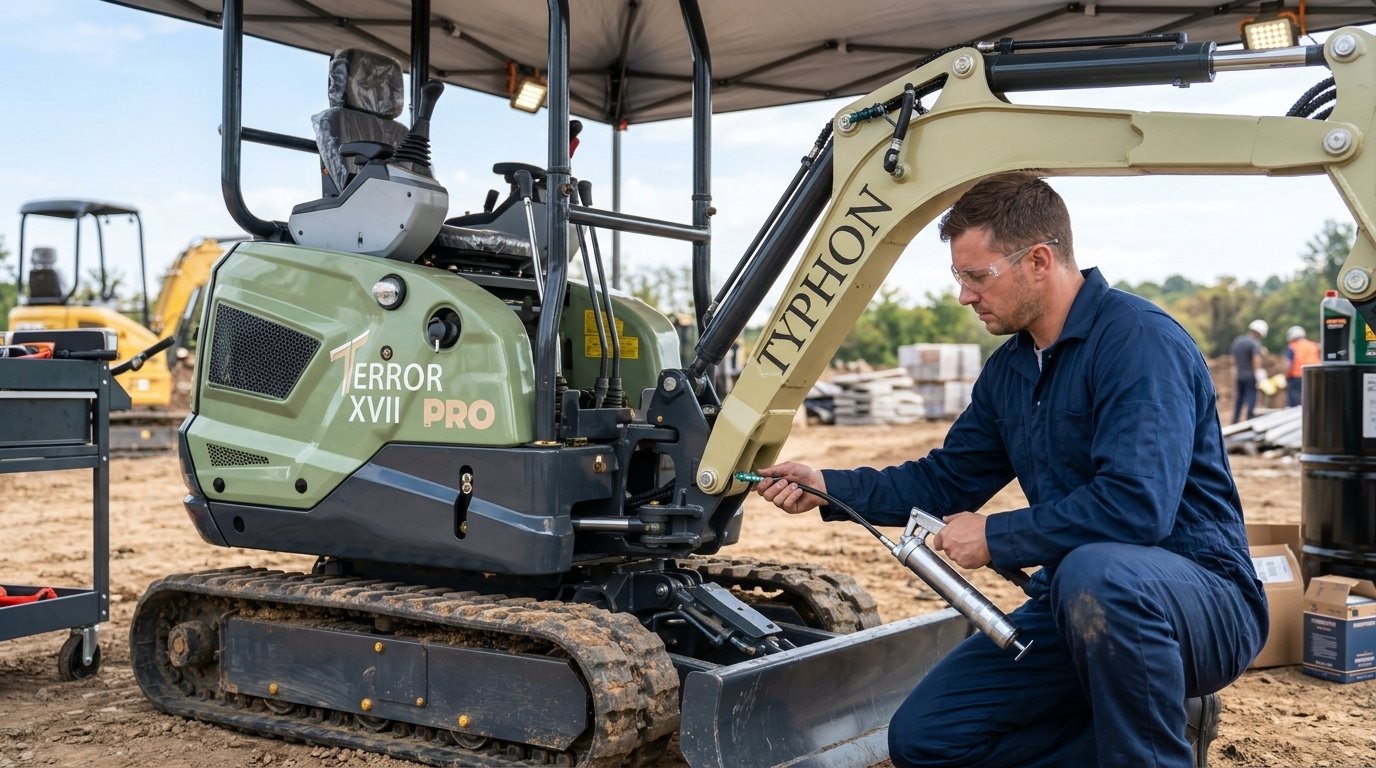
A modern compact excavator, such as the **TYPHON TERROR XVII PRO**, operates under intense hydraulic pressures exceeding 3,500 PSI, with slew ring loads and pin-bushing stresses capable of destroying precision machined components in under 50 hours if lubrication is neglected.
This master maintenance schedule establishes clear, daily and hourly service milestones designed to maximize machine uptime and guarantee peak trade-in value.
The Daily 10-Minute Walkaround Protocol (Every 8–10 Hours)
Before firing the diesel engine each morning, the operator must execute an uncompromised walkaround inspection:
1. **Grease All Boom, Arm & Bucket Pivot Pins:** Pump fresh high-pressure lithium grease with 3%–5% molybdenum disulfide into all zerk fittings until clean grease purges from the pin seals. This flushes abrasive silica dust and prevents egg-shaped bushing wear. 2. **Inspect Engine Oil & Coolant Levels:** Pull the oil dipstick; verify level is within crosshatch marks and check for fuel dilution or milky coolant contamination. Verify coolant expansion tank level. 3. **Inspect Hydraulic Sight Glass:** With the arm fully extended, bucket curled inward, and blade resting on the ground (the standard check position), verify oil level is centered in the sight glass. 4. **Water Trap & Fuel Filter Drain:** Open the primary fuel filter petcock to purge accumulated condensation and water sediment before water reaches the common-rail injection pump. 5. **Inspect Rubber Track Sag (Tension):** Lift one track side using the dozer blade and boom. Measure track sag between the bottom roller and the track rubber. Correct tension using a grease gun at the track adjuster valve.
Comprehensive Service Interval Checklist Matrix
| Service Milestone | Component / System | Action Required | Recommended Lubricant / Part |
|---|---|---|---|
| **Every 10 Hours (Daily)** | Boom, Stick, Bucket Pins, Swing Knuckle | Grease all zerks (12–18 fittings) | NLGI Grade 2 Moly-Lithium Grease |
| **Every 50 Hours** | Track Tension & Hydraulic Breather | Inspect track sag; blow out dust cap | Synthetic Multi-Purpose Grease |
| **Every 250 Hours** | Engine Oil & Oil Filter | Drain oil hot; replace spin-on filter | 15W-40 CK-4 Heavy Duty Diesel Oil |
| **Every 250 Hours** | Fuel Filters & Water Separators | Replace primary & secondary filters | OEM Micron-Rated Filter Elements |
| **Every 500 Hours** | Hydraulic Return & Suction Filters | Replace hydraulic filter elements | OEM 10-Micron Hydraulic Filter |
| **Every 500 Hours** | Final Drive Planetary Gearboxes | Drain and refill hub gear oil | 80W-90 / 85W-140 EP Gear Lube |
| **Every 1,000 Hours** | Complete Hydraulic Fluid Replacement | Drain hydraulic tank; clean suction strainer | ISO VG 46 Anti-Wear Hydraulic Oil |
| **Every 1,000 Hours** | Engine Valve Lash Clearance | Inspect and adjust intake/exhaust clearance | Feeler Gauge to OEM Specs |
| **Every 2,000 Hours** | Engine Radiator Coolant Flush | Drain, flush, and refill cooling system | Heavy-Duty OAT Extended Life Coolant |
Track Tension Measurement & Sag Adjustment
Improper track tension is the single largest driver of premature undercarriage failure on rubber-tracked excavators:
Frequently Asked Questions
Q: Why must I grease the excavator bucket pins daily if they feel tight? A: Bucket pins experience massive digging forces while submerged in abrasive dirt, grit, and mud. Fresh grease acts as a hydraulic barrier, forcing abrasive grit out of the steel bushing gap. Skipping grease for even two days can score the pin, requiring expensive line-boring repairs.
Q: How often should final drive travel motor gear oil be changed? A: Planetary travel drives work extremely hard under high gear reduction ratios. Change the gear oil after the first 100 break-in hours, and every 500 operating hours thereafter. Always inspect the magnetic drain plug for excessive metallic shavings.
Q: What is the primary cause of hydraulic pump failure on mini excavators? A: Particulate contamination and moisture intrusion. Over 75% of hydraulic pump failures result from dirt introduced during attachment changes or operating with depleted hydraulic filters. Always clean quick-coupler faces meticulously before connecting hoses.
Explore TYPHON PROPACT Mini Excavators & Skid Steers
Compare engine horsepower, hydraulic breakout forces, and operating weights across TERROR XVII PRO Cabin, TERROR III, IV, and STOMP 65 loaders.